Compare the difference in effective diameter Conventional JIS and ISO ・ Screw and screw gauge ・ external thread and internal thread
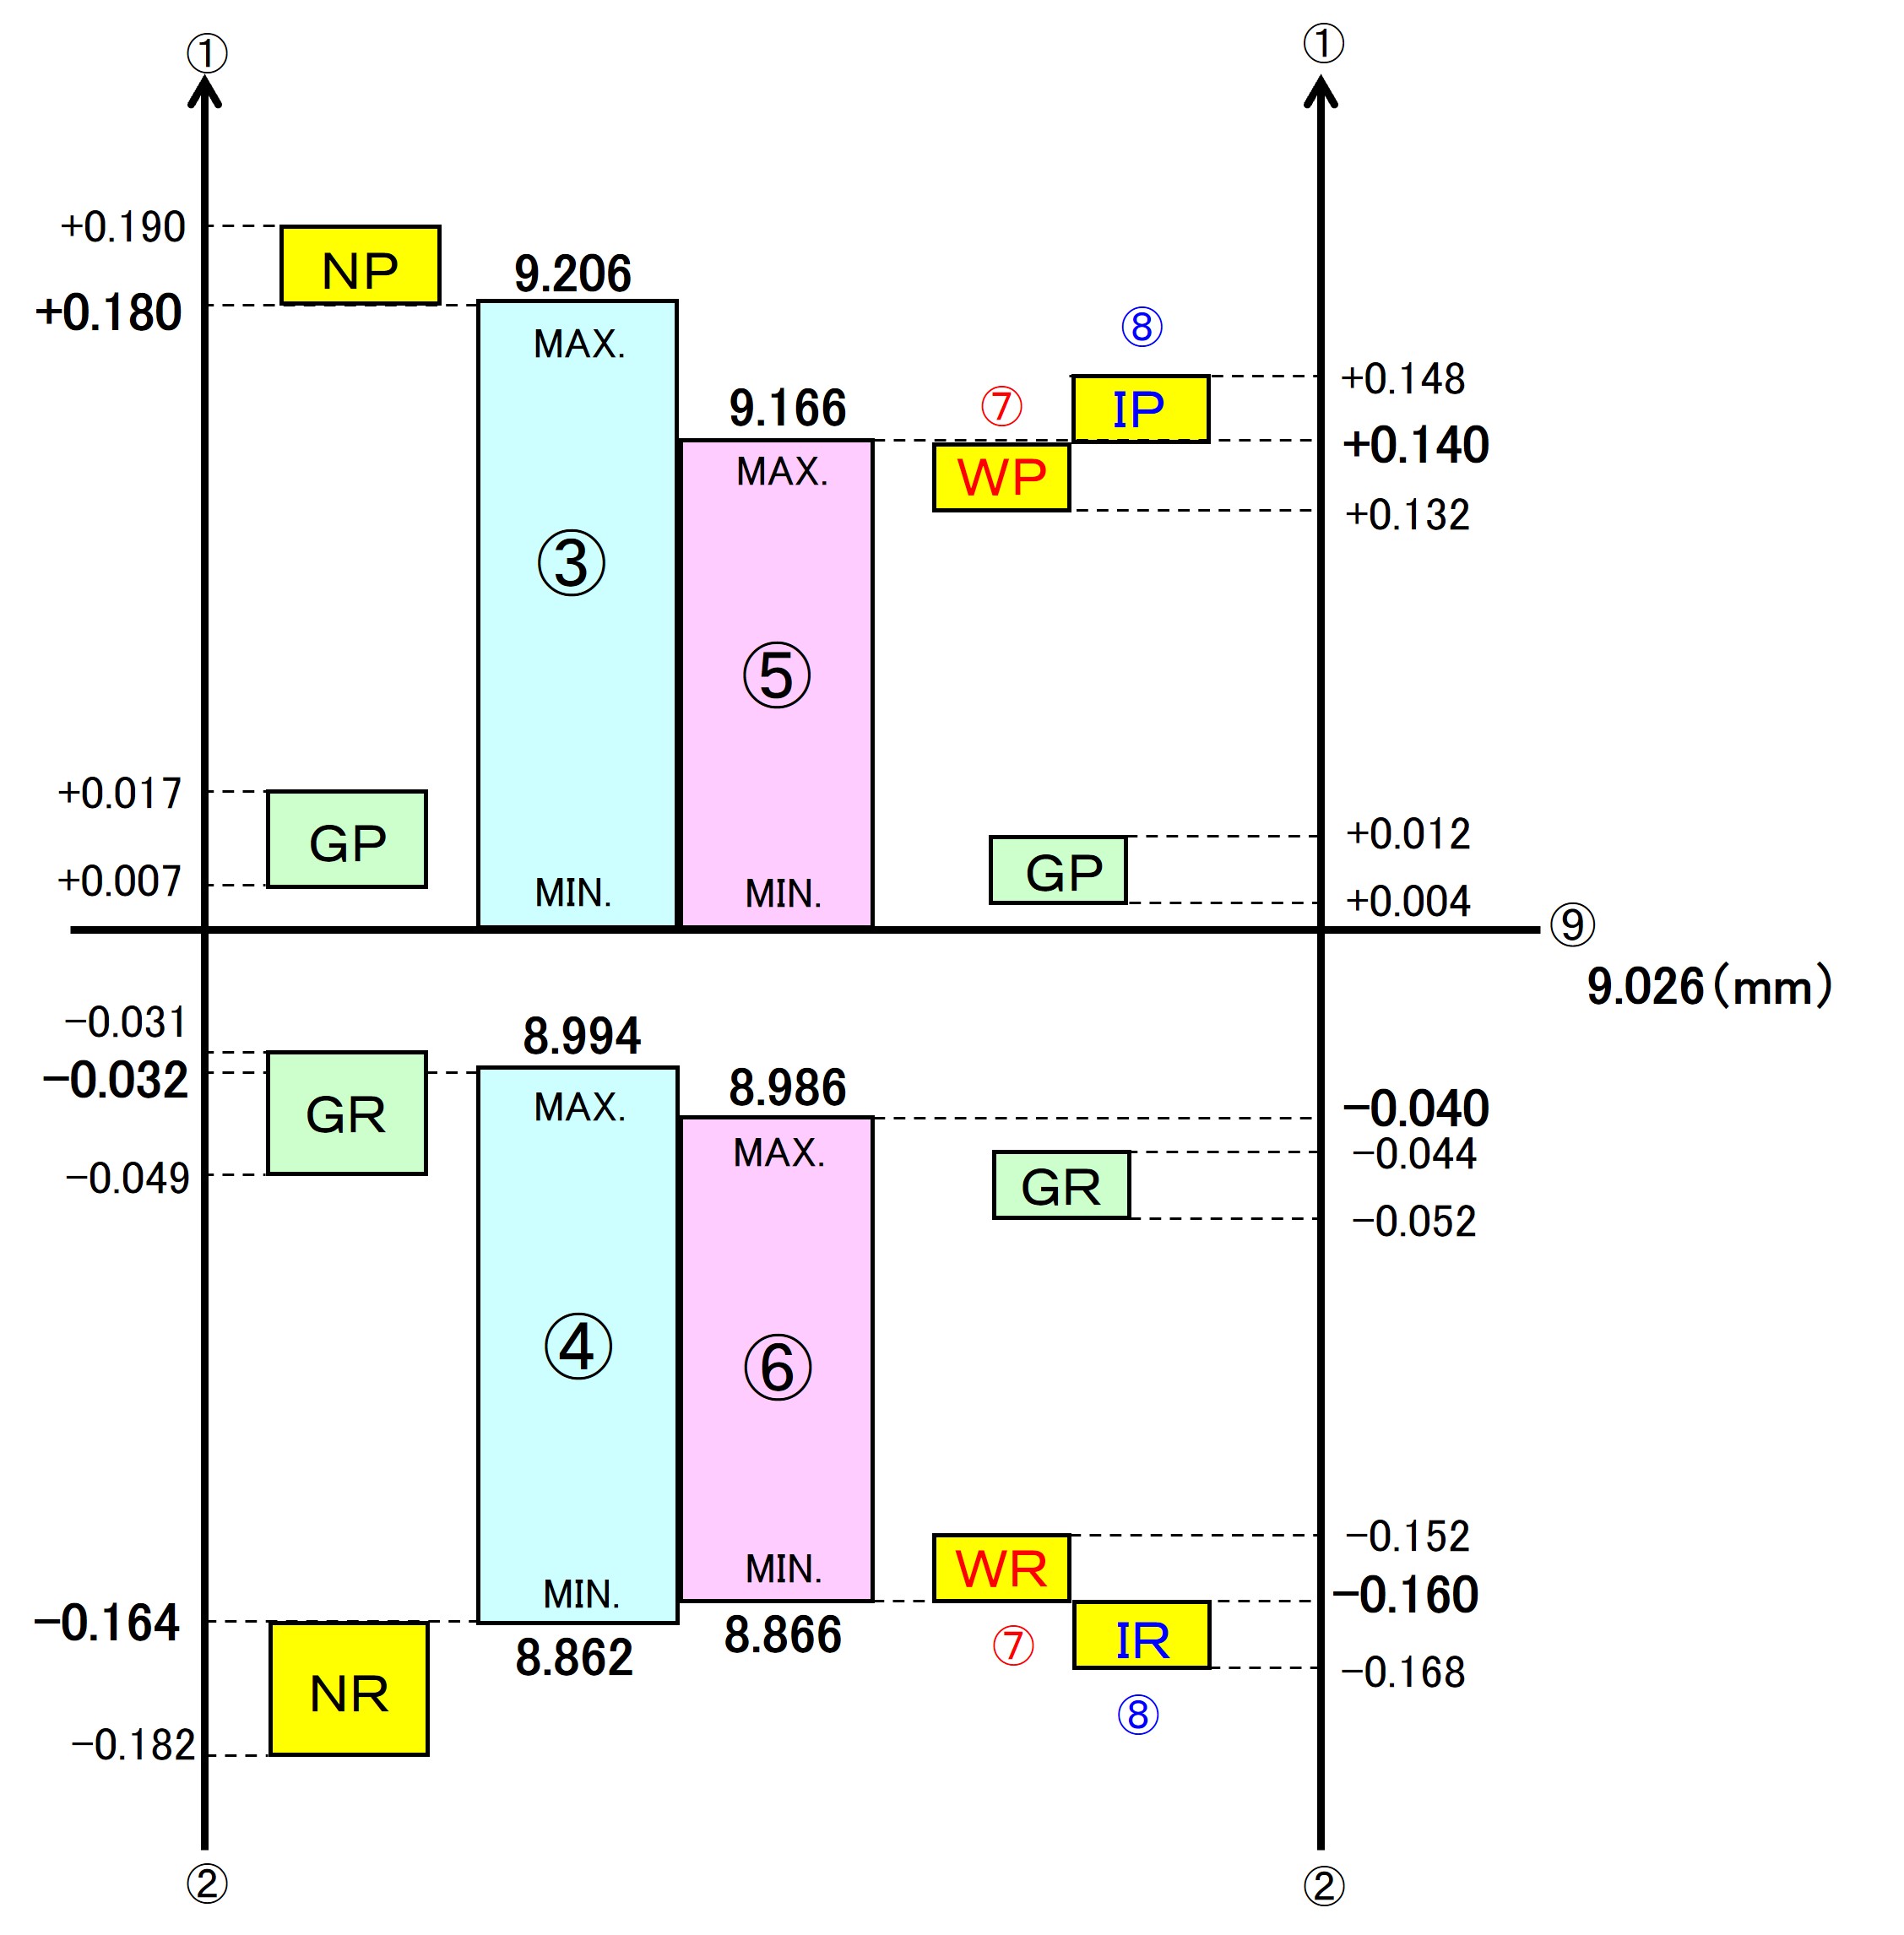
The figure below shows the positional relationship between the thread accuracy, the thread and the thread gauge, external thread and internal thread in the JIS standard, and the effective diameter of each.
Positional relationship between "screw" and "screw gauge" internal thread M10X1.5 2nd grade and 6H (6g)
 |
| (1) Effective diameter (large) (2) Effective diameter (small) (3) 6H internal thread (4) 6g external thread (5) Grade 2 internal thread (6) Grade 2 external thread (7) Machine NOT-GO (8) Inspection NOT-GO (9) Effective diameter reference dimensions |
What can be understood from the positional relationship (1)
Position and range for each screw accuracy The position and range of the effective diameter of the screw are different for internal thread (6H, 2nd grade) and external thread (6g, 2nd grade).
Therefore, it is not possible to use a 6H screw gauge when inspecting the thread accuracy of drawing instruction grade 2.
In addition, when inspecting the accuracy of the drawing indication thread of 6H, even if the tolerance of the grade 2 screw is within 6H, it is not possible to use a grade 2 gauge due to the use of the gauge in the standard.
It is necessary to use a gauge of 6H, which is the drawing indication.
What can be understood from the positional relationship (2)
The ring gauge does not fit the plug gauge If you compare the diameters of each, you can see that the ring gauge is smaller and the plug gauge is larger.
In other words, a small internal thread does not contain a large external thread = the ring gauge does not fit the plug gauge.
If it does, it is suspected that the plug gauge is worn out and has become smaller, or the ring gauge is worn out and has become larger.
Since it may not be able to fulfill its role as a gauge, please stop using the gauge immediately and consider calibration.
What can be understood from the positional relationship (3)
Conventional JIS NOT-GO has a narrower pass range for machine use than for inspection NOT-GO GO .
There is a distinction between inspection and machining in NOT-GO , and in general, the machining side uses machining. The inspection is used for incoming inspections when processing is requested from outside the company.
This is because by doing so, it is possible to obtain a smooth performance in which materials that have basically passed for machining can also be passed for inspection. In ISO, there is no distinction between inspection and machine work in NOT-GO .
Please refer to the JIS Handbook or the website of the Japan Industrial Standards Committee (JISC) linked below for handling discrepancies in the determination of screw gauges between the manufacturer and the user.
You can search by JIS standard number, JIS standard name, and words used in the standard.