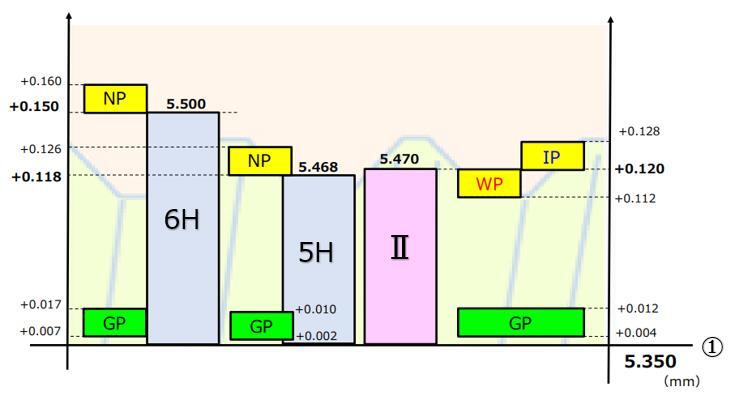
The figure below shows the positional relationship between the tolerances of each effective diameter in thread accuracy and thread gauge accuracy.
Positional relationship between thread accuracy and thread gauge accuracy M6×1 6H, 5H, 2nd class

(1): Effective diameter reference dimension
Reference: Thread Applications and Thread Accuracy
| Name | Screw Grade (Tolerance Range Class) | |||||
| Thread type | Division | |||||
| Metric Thread (M) | External thread | JIS | 4h | 6g | 8g | |
| ISO | ||||||
| Internal thread | JIS | 4H、5H | 5H、6H | 7H | ||
| ISO | ||||||
| Unified Screw (U) | External thread | JIS | 3A | 2A | 1A | |
| ISO | ||||||
| Internal thread | JIS | 3B | 2B | 1B | ||
| ISO | ||||||
| Wet screw (W) | Level 2 | Level 3 | Level 4 | |||
| Use | Screws that require a tight fit | For tightening general machines | General Machinery Chore Screws | Black Skin Bolt | ||
(FAQID:200)